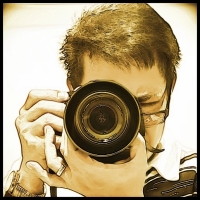
Photo Quotes 47

Capture the beauty of this moment for tomorrow it will be different.~Norman J. Piluke (Image processed through Virtual Studio and polished with PhotoScape, both photo editing freewares. See Resources menu for download links)
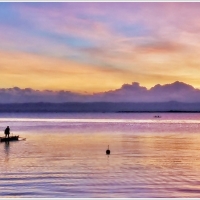
Pop those colors! a word on saturation

You see pictures with eye-popping colors and you wonder “how did they do that?” Images that are well-composed, clear, detailed and with vivid colors stand out. They have the “wow” factor. There are colors that are naturally bright, vibrant and saturated such as yellow, orange and red. The professionals have tricks up their sleeves on capturing these colors and letting them stand out. Some are done in-camera and some during photo editing. There are eight tips listed in this article How to Photograph Vibrant Colors. I’ve been doing some of them such as tweaking the picture setting in the DSLR (I set it on Vivid) and adjusting the saturation curve in PhotoScape (a free image editing program) during post-processing. We perceive colors differently and it may just be a matter of calibrating our monitor when viewing pictures, or adjusting the saturation when we edit. Saturation enhancements must be done properly. Overdoing it results in colors that are blown out and unnatural. Saturation levels in editing programs can be adjusted in increments, a little at a time, so you know if you’ve done too much or too little. Well saturated colors will put the life, zing and bling in an otherwise flat, dull picture.
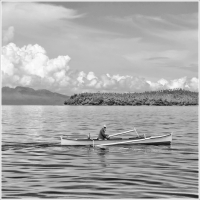
Level your horizon
 Okay, so you took a picture of the setting sun, magnificent in its reddish hue with the sky almost on fire. You even reviewed the image in your camera’s tiny LCD screen and it seemed fine. Now you’re excited to go home to transfer the photos on your computer. Lo and behold, when you viewed the photo on your large PC monitor, the horizon was leaning to one side. Seems like the setting sun had gained weight and the picture was right-side heavy! Some digital cameras have line grids that can be seen when you peer through the viewfinder which is quite helpful especially when taking pictures of horizons. Other digicams don’t have this feature. But no worry. You can straighten slanted horizons during photo editing. The tool I use for this is PhotoScape. It is a free image editing software with tons of functions for basic and semi-advanced processing. I use it to enhance colors, provide back light, deepen tones, sharpen edges, add contrast and many other adjustments. One of its nifty features is a simple slider for leveling an uneven horizon. No more right or left-heavy photos from now on. You can download PhotoScape from its website. (Photo location: On a ship in the middle of the sea off the coast of Panay Island)
Photo Quotes 2

With photography, you zero in; you put a lot of energy into short moments, and then you go on to the next thing.~Robert Mapplethorpe (Photo location: Lake Tri An, Vietnam)
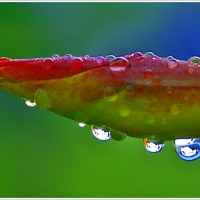
I came, I saw, I edit
 I do not take perfect pictures, that is why I edit them. Professional and skilled photographers have mastered shooting techniques and camera settings for any given situations or subjects, enabling them to create excellent straight-out-of-the-camera (SOOC) images. An ordinary mortal like me is the kind who takes ten pictures, with seven of them fit to be deleted. So what do I do? I post-process images that have not found their way to the trash bin. I do basic or intermediate-level photo enhancements, putting in some “wow” factor in a picture. And I use free photo editing softwares. Lots of them are available on the Web. I wrote a series of articles called “Tried and Tested” that are published at Wikinut. This is where I try out and review some free softwares or Web services and come out with a Top 5 list. One of these reviews is titled Tried and Tested: Top 5 Free Photo Editing Softwares. The flower photo above was enhanced using PhotoScape, one of my mainstay photo editing tools and included in the Top 5 list. Learn of these free photo editing softwares tested by yours truly by reading the article here.
Photoshop online

Above is a dull photo. It is underexposed, has a colorless sky and a dark foreground. I’m not a Photoshop user because I find the editing software expensive, not that user friendly and requires a steep learning curve. Besides, I’m not much into photo manipulation, I’m more into tweaks and image enhancements. But when I came to know of Photoshop Express Editor, the free online version of Adobe’s popular software, I just had to try it. Using the saturation option I was able to put a pinkish-red tint in the sky, brighten up the image, and with the dodge and burn tool was able to highlight the dark rocks on the foreground. Great for basic photo improvements. Try it, sign-up is not even required. Now see the difference with the improved image below.

(Photo location: Loay, Bohol)