Developing your creative eye
With millions of images uploaded to social media and photo sharing sites everyday, you would want at least your images to be original and expressive of your style or vision. You want to produce creative images that will not only get the attention of your audience but also satisfy yourself. To do that you have to find and develop that “creative eye.” Here’s how:
1. Observe
Observation is always the first step before you ever frame your subject, compose your shot or press the shutter. Our eyes are precise machines that take in 260 degrees of horizontal field of view including peripheral vision, at 120 megapixels of high-def resolution. We have the power and facility to observe. The problem is that we are easily distracted. We fail to focus. Hence, we miss details, we miss decisive moments, we miss the light, the lines and other photographic opportunities and elements that would have otherwise made for an interesting image. Learn to hold still and concentrate on your surroundings. Being visually aware is one of the attributes of creative photographers.
2. Practice
It may be a cliche, and practice may not lead to perfection. Yet anyone will tell you that taking time to practice will help you develop your craft. Experts will always say take lots of pictures. We are now not limited to a maximum of 36 exposures in a film roll. Shoot to your heart’s content as much as your memory card can allow. Practice with your shots and practice with your camera. Do not be satisfied with snapshots, everyone is doing it. Aim for photographs of value. Bring out the artist in you, for as you do, creativity will follow.
3. Experiment
Explore your camera’s built-in shooting modes and creative filters. Take panoramic, landscape, portrait, normal shots and those with different aspect ratios. Crop in-cam, zoom, close in, fill the frame, go wide, compose, pan, frame your subject. Get that tripod and go for long exposures or low-light conditions. Attempt to learn, to probe and to understand. What you can do in photography will only be limited by your imagination.
Having a creative eye sometimes come naturally to some people. Others struggle to create compelling images. But always it can be developed. You know the approach and have the means and tools in your hands. Be patient and keep on clicking!
Colorful canvas
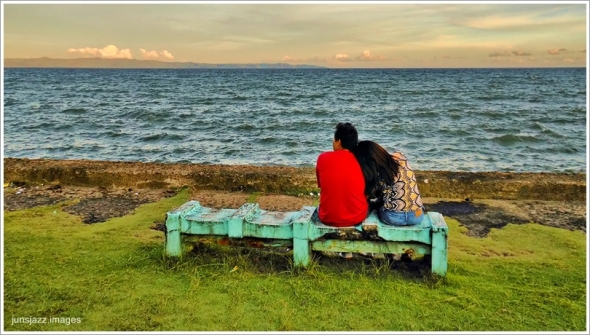
A sunset can be your point of interest. But then that’s just that – sun, sky, clouds, colors. Those elements may be more than enough to carry an image. Yet there are times a sunset can be an interesting backdrop, an exciting candy-colored canvas playing an important supporting role to a main subject. Why this approach? Since sunsets are often paired with sweeping horizons, putting a focal point in your foreground or middle ground indicates scale and vastness. You present an earthly dimension of size, the broadness of nature. Another thing is you ramp up your composition, arranging elements with the the use of perspectives (foreground against a background), placing main subjects in relation to minor ones (framing or rule of thirds), and presenting a general point of view (vantage points or elevated shots). You work out your shots with sunsets. You are given precious few minutes from observation to execution when the sun mellows down and dips into the horizon. And you can take on either or all approaches in a way that is interesting and captivating. You can never go wrong capturing a sunset scene. But everything can go wrong if you don’t know how to.
Without color
Article Excerpt:
Without color the components of visual design become that much more important. Look at the lines in the image. Are they horizontal? Vertical? Diagonal? Do they form a pattern? Rhythm or repeating elements in a photo are interesting, with a break in the repetition being even more interesting. Also look at the texture, shapes, and forms in the image. Concentrating on these will take your mind off the color and enhance your ability to “see” and think in monochrome.
~Joel Wolfson from his article Digital Black and White Photography Tips and Techniques
Elements for B&W
Article Excerpt:
Here’s a run-down of the most common elements that you should look for when identifying a suitable subject for the black-and-white treatment. Remember that these elements can be used individually, or even combined to produce marvellous mono images with clout.
1. Contrast, shape & form
One of the fundamental aspects of black and white photography is that your whole composition relies on contrast (for on composing images, see our 10 rules of photo composition – and why they work). For this reason, look out for subjects that feature simple, strong lines and shapes. It’s often the shadows that define shape and form, so pay attention to areas of darkness, as well as light.
2. Tone
Black and white photos actually include a whole range of greys, which add subtlety to your images. Normally, you look for subjects that will translate into a range of tones from black to white, but you can also get great results where the subject is mostly light (high-key) or dark (low-key).
3. Texture and detail
Fine detail, or strong textures such as weather-beaten stone, foliage or clouds, can help to give your black-and-white shots depth and interest. Strong side lighting is perfect for bringing out the texture in any subject. You can use strong natural light, or get creative with flash to create sidelighting on the subject.
4. Graphic composition
Black-and-white images need strong compositions to really work. Keep an eye out for strong lines or features in your scene that can be used as leading lines, or positioned diagonally across the frame to create dynamic images.
~Black and White Photography: What Every Photographer Should Know
Try it with flowers
The one subject that will give you the best abstract images are flowers. Zoom in, macro or close up, and capture those delicate curves, arches, shapes and spirited colors, and bring them out in looming proportions and surreal dimensions. Crop out the edges, play with light, use selective focus or blur, present them in panoramic 16:9 aspect ratio or in tight 1:1 square format; you’ve got a lot of creative options in your toolbox. The approaches are yours to discover and experiment to come up with the best abstractions from nature’s little angels. Here are samples from my collection.
Abstract photography tips
Article Excerpt:
Quick Tips to Make Something Look More Abstract
1. An effective method is to crop out visual references that will immediately identify the subject.
2. Find something in your subject that shows clean shapes or lines.
3. Look for repeating patterns in your subject that you can focus on because they provide a sense of balance to the shot.
4. Light and shadows is a great tool in creating an abstract shot.
5. Use colors to give more impact.
~Allan Peterson from his article Abstraction in Photography
(Note: the above are short extracts; to read the full article please click on above link)
Enhance that abstraction
Article Excerpt:
The Power of the Selective Focus Technique
If you’re searching for an easy but effective abstract photography technique, selective focus is the technique for you. A narrow depth of field is achieved by the selection of a large aperture. The camera is then focused on the center of interest of the image. The rest of the objects in the image will fade into a soft blur.
There are two things which can be done to make your images even more notable when utilizing this technique. First, the color of the background should be different from the center of interest. The second point is that the center of interest can be made even stronger by using curves to point toward the center of interest.
The Use of Light and Shadows
Using the interplay of light and shadows can create drama in an image. Now, some photographers tend to think only in terms of light. This is a mistake — for light is nothing without shadows. Shadows are not just a lack of light. Instead, shadows function to make the light come to life. It is the shadows that shape the light, that draw attention to the light, and that integrate with the light to produce striking photographic opportunities. This is especially true with abstract images.
So, what is the shadows’ role in this technique? The primary role of the shadows is to help to define the forms. In other words, the shadows’ role is to help the forms to stand out. Consequently, it should come as no big surprise that the more interesting the objects in an abstract image, the more likely that the image will be successful. The shadows then function to make the more prominent.
~Ron Bigelow from his article Abstract Photography Tips and Techniques
Details, details
As in our tips last week on photographing stained glass windows, we tackled on zooming out or backing farther away in order to capture the whole piece. On the other hand, we are advised to zoom in on parts and areas to emphasize details. In my experiences in photographing boats I also follow that process – get it wide to capture the subject whole then zoom in on areas to get some particulars. That way I get as much perspectives and variety in my shots. Details can be a confusing mishmash of objects, colors, lines, shapes and forms such as the picture of a tanker ship below, or it can be a clean image showing the finer points of a fisherman’s gear like the picture above. Why are details important? As in anything else, details comprise the big picture. Let me share a quote from sociologist Howard S. Becker:
“Every part of the photographic image carries some information that contributes to its total statement; the viewer’s responsibility is to see, in the most literal way, everything that is there and respond to it. To put it another way, the statement the image makes – not just what it show you, but the mood, moral evaluation and casual connections it suggest – is built up from those details.”
Shapes, perspective, background and texture in B&W
Article Excerpt:
Take Shapes into Consideration
Since black and white pictures lack color, they are dependent largely on lines and shapes to create interest. Try to incorporate a variety of shapes that create different types of lines such as curving lines, crooked lines, or slanting lines. Stark straight lines can also have dramatic effects in black and white photos.
Mind Your Perspective
Perspective can create some very interesting effects, especially in black and white photography. Perspective can bring alive a standard subject, it can suggest depth and mystery in everyday objects, and, in fact, you can make a picture tell a story just by using an unusual angle while photographing a scene in black and white.
Take Care of the Background
While taking black and white photos you need to make sure that the subject does not get lost in the background. Often, just by shifting your subject a little to the left or right can help in eliminating unwanted elements in your photograph. Or you could try to take the picture from another angle.
Add Texture
Texture can add interest and definition to black and white photos. For example, a black and white picture of a roughly textured wall will certainly look more interesting than a smooth wall, or a road made of cobblestones will look more dramatic than a smooth one.
~Rita Putatunda from her article Tips for Shooting Black and White Photos
Stained glass windows: zoom in and zoom out
Article Excerpt:
Framing
Windows in churches are often quite large. Sometimes they are too big to fit completely into your frame. Experiment with framing to get around this.
Many people tend to hold their camera horizontally to take pictures, but you can also hold your camera vertically. Most windows will fit better in the frame when your camera is held in this position.
Sometimes including bits of the wall around window will naturally add interest to your picture by framing the window. Sometimes you may only want to include the window in your picture with none of the wall around it.
Look for details in the window that will look good in a picture. Sometimes taking a picture of an entire window doesn’t give you the best results. You can zoom into individual images in the glass and get a more interesting and detailed picture.
You can also deal with windows that are too big by taking separate pictures of different sections of the window and then combining them in an image editing software program.
Try a bunch of different framing options to see what looks best.
Distortion
When you take a picture of a window you’re usually looking up at it. That will distort the look of the window by making the top of it appear narrower than the bottom. You can avoid this by standing back from the window and using your zoom lens to get a closer picture.
~Stained Glass Window Photography from Digital Photography Advisor
Know what the event is
Article Excerpt:
It goes without saying that if you want to photograph a festival, you should know what the festival is all about! You should know how it originated, what it commemorates, and what the significance is, in relation to the current times. Armed with this knowledge, you could decide your “workflow” – the series of pictures you should take to record the event without missing out on any important picture taking opportunity. In other words, do your homework and plan out your strategy rather than going to the festival and then taking photos haphazardly. If you are new to the location or if you have not covered such a festival earlier, it would be wise to ask the locals about the path of the procession, the type of ceremonial floats, the time for the event to start, and whatever other information that you think will help you in your picture-taking project. If you can check out the details with the organizing committee, so much the better, as the information could be more specific, and more reliable. All this takes time, so make sure you don’t think of ‘what-am-I-supposed-to- do’ at the last minute. Remember though, a festival may not necessarily have a parade and floats.
~Rohinton Mehta from his article How To Photograph Festivals
All about light and shadow
Article Excerpt:
Black and white photography can seem dull next to the burst of colours emitted by colour photography, which creates a feeling of optimism and joy. Today, however, people are rediscovering the purity, beauty and power of black and white photography, which strips the image of the interpretive colours and has the ability to portray the timelessness, deep human emotions of pain, loss or despair.
Although the subject you are photographing is an important element of the picture, there are some other important factors to consider when shooting black and white photography. Basically, black and white photography is all about light and shadow. If you want to create stunning images, you need to learn to use these elements to compose your photos effectively and correctly. Experiment with the quality and intensity of light and try to take pictures of a subject at different times of the day and notice how light and shadow can affect the mood of the photo. For example, take a picture of a subject on a cloudy day, and then photograph the same subject on a bright day.
~The Art of Black and White Photography from fotoLARKO.com
Abstract approach
Article Excerpt:
Step 1 – What is abstract photography?
Handily, there isn’t really a defined meaning or explanation of what abstract photography entails, and in the same regard to abstract art, the content of the work is essentially unimportant and often entirely ambiguous. What does take precedence is the form, colour, line and texture within the composition, to create a piece that is visually stimulating. With regard to abstract photography, you don’t need any sort of special equipment, just a camera, any camera you like, and your imagination.
Step 2 – It’s all in the approach
So how does one go about taking abstract photographs? The first thing to remember is to keep your eyes open for interesting and engaging subject matter. Whenever I shoot abstract shots, I’m always attracted to the subject matter instinctively; something about it will catch my eye and draw me in. React emotionally to the subject, consider why you were attracted to it and how it makes you feel and this will inform how you photograph it. Spend time with the subject, think outside the box and approach it in a means that you would not really approach it, from different angles and regardless of its usual purpose.
~Simon Bray from his article Creatively Approaching Abstract Photography
Be passionate about your photography
Interview Excerpt:
What are some tips you could give to people that really like your work?
Learn the basic photography techniques, learn how to edit and then learn to create your own unique vision. Everyone has his own vision, his own thoughts and feelings on the world we live in – try to discover what that is. That is more important than the technical skills. But most importantly: love what you do, be passionate about it and learn to create what YOU love, even if it means that no one else but you will appreciate what you’ve created.
~Joel Tjintjelaar on The Art of Black and White Photography from PhotographyOffice.com
Go out and shoot
Article Excerpt:
Go Out & Start Shooting
The human brain wants you to find the perfect idea. By going out and shooting whatever random subject matter is there (no matter how dull) can create inspiration within itself. Go out and shoot that fire hydrant, doors, trees and whatever other random, dull, static objects you may find in your line of vision! It may lead you somewhere unexpected.
Find A Color
Go out and shoot one color. Narrowing your subject matter down to one color will make you see photographs you never would have otherwise. Different colors have different moods too. If you are feeling calm and cool, go shoot blue. Do you feel happy? Shoot yellow or orange. There are many internet resources that you can look into to explore the color wheel and emotional interpretation of color.
~Some Thoughts on Photography by Dr. Dennis Woytek
It ain’t only flowers and fruits
Article Excerpt:
Still life is the study of an inanimate object…takes you right back to 6th grade art class! However, still life images are not restricted to painting and drawing – many of us take still life photos every day without actually realizing that we are taking a “still life”. When you really think about it, you may realize just how many still life’s you’ve taken over the years. In the traditional sense a still life is often thought of as a bowl of fruit, a vase of flowers, or an arrangement of related (or non-related) objects. But ultimately any type of objects that you set up or create as a scene can be a still life; they don’t necessarily need to be flowers or fruit. The key to creating a good still life is thinking about the object in terms of setting the scene.
~Still Life Photography Tips from The Beginners Lens
Creative control in still life
Article Excerpt:
There aren’t many photographic practices that date back further than still life photography. When photography originated, it was necessary for exposures to be quite long, so photographing static objects was the ideal subject matter. However, as the technology developed, the fascination for capturing still life has remained and is still one of the most viable photographic professions today.
At the top end, it is an extremely lucrative business, as magazines, catalogues and websites all require product shots. There are many advantages to working with still life that are often underestimated, so hopefully you’ll be able to see it’s scope for creativity and get started with taking some shots yourself!
Contrary to common perceptions, you don’t need a studio or a fancy location to make a start with still life photography. You can begin by simply using a space at home, such as a table placed by a window, along with a simple backdrop and utilizing a couple of lamps.
It varies greatly to landscape or portrait photography, in which you are provided with the subject matter, for example, a stunning mountain scene or a model, which come with a huge amount of variables, but the creative content is there in front of you. With still life photography, there are far less variables, you, as the photographer have complete control over the situation, including the subject matter, but you need to think extremely creatively in order to capture it in an interesting and engaging way.
~Simon Bray from his article 10 Tips to Get Started with Still Life Photography
On the hunt
Article Excerpt:
Always have your camera with you and always keep your eyes open. Serendipity plays an enormously important role in travel photography. You never know what you are going to run into, and you have to be ready. Many times you will see what could be a good photograph but decide that the light is not right, or there are no people around, or too many—something that means you will have to come back later. But sometimes you get lucky. You happen to stumble upon a scene at just the right moment. If you forgot your camera, are out of film, or your digital card is full, if you have to fumble around getting the right lens on, the moment may be gone before you can recover. This is true whether you are doing street photography or visiting a natural or man-made site. Mountains, trees, monuments, and other static subjects are, of course, not going to go anywhere, but the ray of sunshine, the soaring eagle, or the embracing couple that add the needed element to your photograph are unlikely to hang around. Think of it as hunting—whenever you leave the confines of your camp, you should be ready and able to capture whatever pops up.
~Robert Caputo from his article Travel Photography Tips
The challenge of rainforests
Article Excerpt:
There are three aspects of rainforest photography that must always be kept in mind; 1) it is very hot and very humid in tropical rainforests, 2) it is dark in rainforests, and 3) there will be lots of neat things way up in the canopy that you will not be able to photograph, and things you will hear but never be able to see! Frustrating but fun!
In the “good old days” of film photography, the heat and humidity could sometimes cause the shutter mechanism of a camera to slow or simply stop working. Digital cameras do not have this weakness, BUT – moisture is the enemy of anything electronic. There are obvious tools to use, such as a small umbrella carried in the camera bag to hold over the camera to shoot in the rain, but more subtle than the threat of rain is that of the humidity. If you take a camera out of an air-conditioned room into a hot humid environment, moisture will condense not only on the outside of the camera and lens, but possibly inside as well. A simple solution is to keep you camera and lenses in an air-tight case, and allow time to adjust to the heat before opening the case. If you have an air-tight case, load it up with moisture-absorbing packets before your trip. A more simple approach is to keep your camera and lenses (and flash) inside sealed Zip-lock bags for a few minutes when leaving a cold room. It is OK to take them directly from the heat into your cool room – let them cool down and any moisture evaporate before putting them back in their Zip-lock bags.
It is dark in the jungle! Look for shafts of light landing on flowers or insects to find interesting contrasts. Always have your flash, and realize that without a powerful flash you probably will not be able to photograph those birds and monkeys (especially the ones that are moving!) that you see 30 feet in front of you! Plan on using your flash a lot – take extra batteries! Remember the value of fill-in flash…
~from the article Taking Photos In The Rainforest
Your perspective
Article Excerpt:
Perspective is the way you look at the things around you. Yes, a cable wire may just be that – a cable wire. But the fact that it is ordinary, doesn’t mean it isn’t worthy as a subject for your photograph. This is where having a photographer’s perspective comes in handy!
The key to producing photos with unique perspective is to be open about your point of view. What are the techniques you can use to do this? Here’s a few:
- Take a moment to imagine your subject from different points of view and angles.
- Get low or move above your subject to see it from another angle making it seem big or small.
- Move away from the subject, or nearer to the subject to create a new perspective or to give the subject a bit of space.
- Stroll around your subject. There may be an unusual or interesting viewpoint you haven’t seen from where you’re standing.
- Work with the light source. Lighting can help you present your subject in ways you hadn’t thought of before.
Be like a child
The photo below is a toy of my niece. It’s a multi-colored plastic springy thing shaped like a star. I looked through it and saw, well, a star-shaped tunnel. Immediately I took my camera and tried to poke the lens through the toy to get a shot. I struggled to get a shot and tried to bend here and there the springy, elastic toy. My niece was amused at what I was doing. I was like a child again, not playing with the toy, but trying to muster a decent shot.
We photographers are the curious, inquisitive type. Upon seeing a potential photographic subject, we stare and take a look, and often fuss about it. We become a child again, wide-eyed, all the while thinking of how to tackle the subject – the angles, perspective, framing and composition. Which is a good thing because it opens our eyes to observe carefully and “see” things in a whole new light.
Martin Lee Leddy has this to say from his article Using Your Inner Child’s Eye:
“Let your eye wander to the normally unnoticed things, and go photograph them. Morning light is a wonderful source of inspiration for taking macro photos of insects, flowers, dripping water, dew covered spider webs and other things we haven’t looked for since childhood. Use wide angle lenses for photos of scenery, and search for opportunities to take other photos of things that later in the day carry no mystique. Look for dew drops, coiled hoses, shadows on the buildings and photograph them all. Enjoy seeing the wonder through the eyes of your inner child. Remember, Look for the details!”
Once the lens was snugly fit inside the other end of the springy toy, I smiled at my niece and beckoned her to look at the camera’s viewfinder and she let out a loud “wow!” upon seeing the image (which is the above photo).
The great wheel
Last weekend I was again, my second time, at the Mall of Asia in Metro Manila. My previous post about this Mall was titled The Random Shot wherein I was at an escalator inside and randomly took a picture of a geometrically interesting glass and steel ceiling. No thought and preparation came into that shot. This time around I was outside the Mall complex but within its grounds was this gigantic Ferris Wheel towering probably some ten stories high. I had an hour to spare and I wasn’t going to pass up this one without thinking of my shots and approaches. This was my first time to shoot a Ferris Wheel, and just how does one photograph something that is sure to strain the neck? Let me count the ways…Seriously, I had lots of angles and perspectives to choose from. It was high noon with thin linings of clouds; I was shooting against the light. That backdrop of sun and sky became key elements in the composition. Here is a short but spot-on tip on how to tackle the subject of Ferris Wheels:
“Ferris Wheels are a great spectacle to photograph…Going beyond the standard tourist photographs of minimal distortion (good, but not the most original) and taken at a distance away from the Ferris Wheel, try to position yourself close-up and photograph with a wide-angle lens. If the Wheel is illuminated – experiment with a slow shutter speed and capture the circular motion, creating a blur of colour and light, and remember to fill the frame – wasting no space in your composition!”
~Ferris Wheel Photography from Scott Photographics Inspiration
If I had stayed till sunset I could have captured more colorful and subdued photographs and could have experimented with long exposure. Anyway, do visit the link above which also showcases lots of Ferris Wheel images to give you an idea on the various ways to photograph this interesting subject. Here are but two of the many images I took last weekend.
The urban feel
Article Excerpt
Towns and cities often have their own unique “feel” that makes them different from anywhere else. A successful urban landscape photo should capture this essence, but it isn’t always an easy task. The key is to think about what the place means to you, how it makes you feel, and what places are special to you. Then look around for a way to introduce this feeling into your photo.
Small details can really add atmosphere to an urban landscape photo, so try to include them alongside the more obvious subjects such as impressive buildings or monuments. Things like an overflowing rubbish bin, a cracked pavement tile, or a traffic jam tell a story in themselves, and help to give your urban landscape shots context.
Don’t forget that the vibe of a city doesn’t always need to be a positive one – sometimes you might want to show just how dirty and unfriendly a place is. Your photos should always tell a story from your point of view – after all, urban landscape photography is just as much about self-expression as it is about showing off a town or city.
~Urban Landscape Photography Tips from PhotographyMad.com
Photo Quotes 147
What’s really important is to simplify. The work of most photographers would be improved immensely if they could do one thing: get rid of the extraneous.~William Albert Allard

